Many people find meditation and breathwork to be challenging, yet the research is clear that the benefits are manifold, helping to reduce stress, anxiety, improve sleep, enhance focus, among many other positive outcomes.
Most mindfulness meditation focuses on the breath. You sit, pay attention to the air in your nostrils or chest, and, when aware of being distracted by a thought, come back to the breath. For many people, this does not work. They do not find the breath to be an anchor to help hold their mind. Instead, they find their mind racing and are unable to sit for longer than a few minutes.
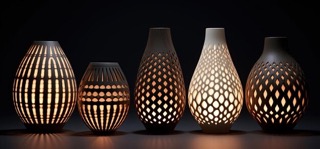
For this project, I wanted to approach meditation and breathwork by leveraging a different sense: vision. With maintaining a soft gaze on an object, one can induce a similar level of flow and mindfulness. I envisioned the object to be a glowing lamp or orb with gentle, soft light that dims and brightens. Breathing is then guided by ebbs and flows in the glow of the light.

Ideally, the lamp could be responsive to the user, reading their heartrate and/or respiratory rate. It could also incorporate a sensor that is responsive to the user. Breathwork can be both relaxing and energizing, ideally, there are different options and settings to choose from, whether a slower or faster breathwork pattern. If someone is stressed or anxious, the lamp could pick up these signals and help the individual to slow down and achieve a calmer state. The lamp would help them lengthen their inhales and exhales and to settle into a state of greater focus and relaxation. It could also assist individuals with insomnia or anyone with sleeping difficulties. In contrast, if the user is seeking energy and wakefulness, they can choose the option of more energizing breathwork patterns.
I am particularly interested in holotropic breathwork patterns, which, through complicated patterns of pacing the breath, can dramatically reduce stress and induce non-ordinary states of consciousness, similar to deep meditation (or psychedelics). This increases the complexity; it's not only about patterns and duration of inhales and exhales, but also finding a means of communicating the depth someone should breathe in or out. For example, an instructor may ask someone to: inhale for 10 seconds, exhale 75% of the way, hold for 30 seconds, and continue in this pattern. Although meditation breathing lamps exist, I could find no existing object that would guide someone through a holotropic pattern.
I also want the lamp to be aesthetically simple and beautiful. Some inspiration:
Most of my time on this project focused on electronics. During input and output weeks, I gained familiarity with breadboarding for the first time. Using the Raspberry Pie Pico “Getting Started Guide” I learned how to turn on an LED, blink an LED, and use a button. It was a steep learning curve to arrive at designing and printing a circuit board.
Before designing the PCB, I went back to breadboarding. I switched over to the Xiao SAMD21 microcontroller. Looking back, I wish I had stayed with the Raspberry Pie Pico W. I had practiced more with the latter and it also had wireless capabilities, giving me that option to incorporate later if possible. I think sticking with the microcontroller I knew best would have made my project progression easier.
First, I needed to solder header pins onto the Xiao SAMD21. To do this, I utilized a breadboard to hold the microcontroller steady. I also soldered two LED strips. I find soldering to be difficult and nerve wracking, so I took my time with this.
I also thought about incorporating a speaker and a sensor. I purchased a few speaker options at Micro Center, but did not ultimately end up using them. I breadboarded the HCSR4 sensor available in the lab. I reviewed the data from the sensor in the Arduino IDE. Ultimately, I did not incorporate the sensor into my project, but it was great to have the chance to test another input device.
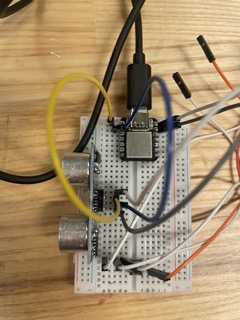
To mimic breathing, I planned to use an LED strip to fade in and out in different durations that followed commonly facilitated breathwork patterns. I breadboarded one of the LED strips (5V, data, and ground wires) along with the microcontroller. The LED strips require a specific Arduino library. With that in place, I ran one of the striptest examples available on the library. Nothing was working! Another student in the Harvard section and I were both having trouble getting the LEDs to work. Eventually, we realized that the issue is that we were missing a ground wire. This took a surprisingly long time to figure out and it felt like a big win when it was resolved.
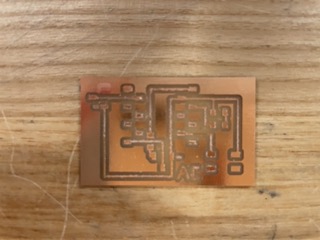
I decided to create a very simple PCB design to attach both an LED strip and a speaker (I still was considering coming back to this); this also served as a backup in case header pins failed for the LED strip. I designed the PCB in Leo’s program. He helped me to export the traces and prepare the machine for milling. My first attempt to mill the board failed. The double stick tape did not hold and the copper would not stay steady, damaging the design. We realized that the larger sizes of copper sheets were warping. I tried again with a smaller sheet, which adhered better to the surface and successfully milled the PCB.
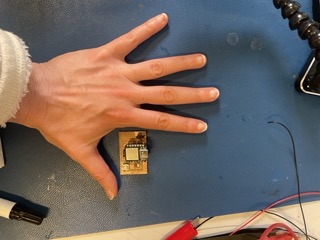
The next step was to assemble the PCB and solder everything. This was very challenging, and Leo helped me greatly in the process. Finally, the PCB was assembled and my hardware was ready!
I next used the Arduino IDE to adapt code from the library to make the LEDs fade in and out at certain patterns. Prior to this semester, I had no experience with coding. Fortunately, this semester I was concurrently enrolled in a computer science class and gained some basic understanding. I adapted existing code in the library to create several different breathwork patterns and finalized two for use in the demo.
The electronics were completed! Although simple, I came a long way from the basics of breadboarding a single LED. Now I was ready to create the structure of the lamp. To do so, I knew I wanted to use the CNC machine and the laser cutter. In the sprint of this class, I had never had time to come back to using these machines aside from the weeks they were assigned. This meant that it was only the second time I ever used them.
First, I needed some designs. I’m still gaining proficiency in CAD and, because electronics took the bulk of my project time, I decided to keep the lamp design very simple. I also prefer an aesthetically simpler design. I designed a simple shape to be printed on the CNC machine and, with Joe’s help at the Reef, I cut these shapes in OSB. I then laser cut the same shape, slightly larger, in order to have a more defined top and bottom for the lamp with a nicer aesthetic.
I knew dowels were available in the Reef, but supplies were running low and there weren’t any available at the correct size of my design. For this reason I had to use dowels that were slightly too small and figured out a hodge podge way to reinforce them with wood glue and hot glue.
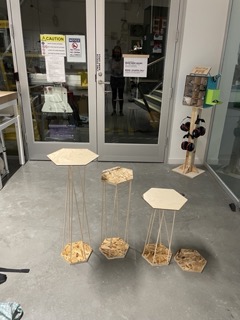
Originally, I had planned to create three lamps that were the same design but of different sizes. I wanted to have these lamps “breathe” together and then each to different patterns. However, as time was running short, I scaled back.
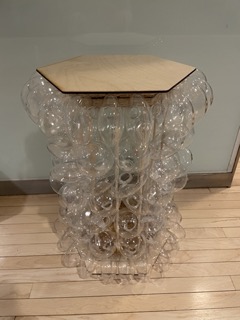
I created one lamp prototype with some repurposed clear ornaments—I thought it might be interesting to try with the LEDs. Adding these to the lamps changed the dimensions in a way I wasn’t expecting, and I ultimately did not like this design.
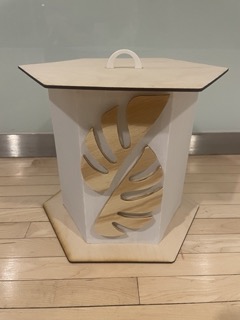
I built a second lamp that was very simple. I found a recycled lamp shade and used the fabric to diffuse the light. I also incorporated a plant silhouette that I made during the CNC week. I designed a small handle in Fusion 360 which I 3D printed and attached.
Now it was time to assemble the whole thing. Unfortunately, in the process, I damaged the PCB, accidentally knocking off some of the header pins intended for the LED strip. The copper was stripped, so that area of the board could not be recovered. I still had another header pin option available on the board. However, when I looked closely, I realized that I had not connected it to power in the design, so it was not functional. I attempted to solder new header pins on the board, but damaged it even further in the process.
After all the work to design and produce the board, this was quite a setback. Because of the lack of time, I returned to a breadboard, which was unfortunate. Leo helped me with creating a small button PCB, so at least I had an input and some PCB in the final product. I think one of the lessons I learned is, if it isn’t too costly in terms of materials, print a backup PCB.
Fortunately, although I did not have a PCB and had to rely on a breadboard, the final product worked for demo day. With additional time I would go back to the design of my PCB and, now having learned so much in this process, tweak the design and reprint it. One of my major lessons learned is to have backups of everything!
Overall, this semester provided a tremendous learning experience. Prior to this course I had never: used CAD, 3D printed, laser cut, molded/casted, CNC’d, embroidered, touched electronics or built anything with code. Although what I produced was modest, I feel like I’ve come a huge way since the beginning. I have some confidence to use machines that would have previously intimated me.
More than that, I feel like I developed as a learner. This is the first time I’ve ever engaged in this type of intensive project-based learning. It’s challenged me to think and create in very different ways. It’s a completely different modality of learning. Also, it was a delight to see what my fellow students in the class envisioned and created. This gave me a rare look into a world that I don’t normally step into and I’m leaving inspired.
I’m excited to continue to develop these skills personally and continue the learning journey. I’m also very excited to bring what I’ve learned in this class, especially the pedagogical approach, into my work as a k-12 systems leader. I am grateful for the opportunity!